| Operation Manual | |
|
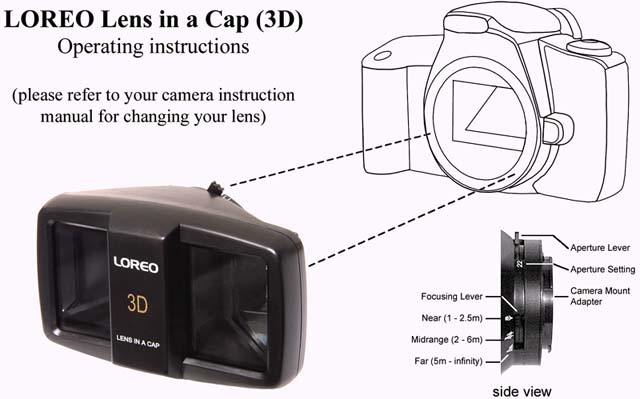
Welcome to the LOREO 3D Lens in a Cap(please refer to your camera instruction manual for changing your lens)Please also view the page of Tips for taking 3-D pictures. Packing List
General Instructions
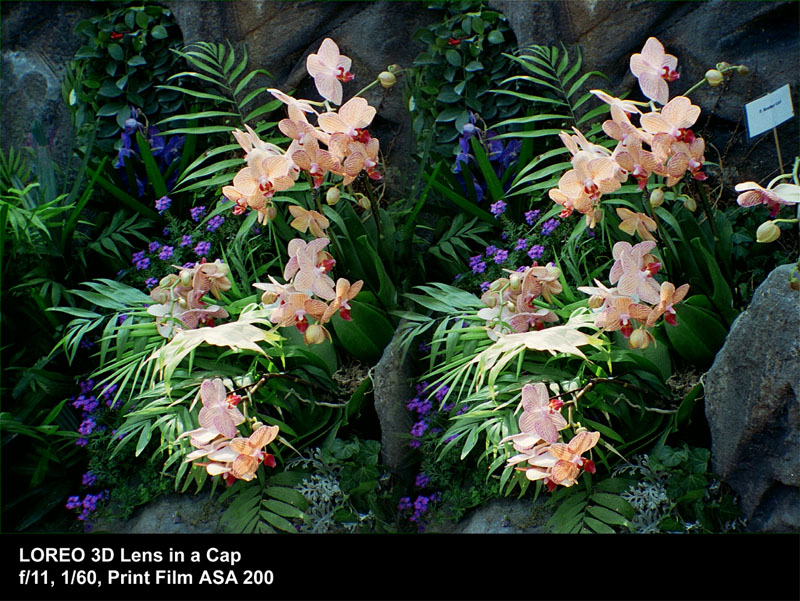
1. Line up the index mark on the back of the Loreo 3D Lens in a Cap with the index mark on the camera body and attach it to the camera. 2. If you are using an M42 screw mount adapter on your camera, you cannot use the 3D Lens in a Cap. The only way of aligning the cap on the horizontal would be with a custom fitted adapter and mount. 3. Turn off auto-focusing before using the 3D Cap. Auto-exposure should work. If not, turn that off as well. 4. Usage: First select aperture by turning the aperture disc. Make sure it clicks into place. Set focus to Near (1 - 2.5m), Midrange (2 - 6m) or Far (5m - infinity). The 3D Cap works with TTL flash, Aperture Priority (AV) or Program (P) mode exposure on most cameras. For manual control use a light meter or exposure chart. 5. A note about light metering is that many SLRs and digital SLRs require an adjustment to the Exposure Bias for auto-exposure to work well with the 3D Lens in a Cap. This is because the 3D Lens in a Cap has dual lenses which cause the the light meter to over-estimate exposure required. An exposure bias of -1.5 to -2.0. is usually sufficient. 6. The Cap has no auto diaphragm, so the viewfinder image darkens when f/22 is chosen. This allows the user to judge depth of field, and has no adverse effect on the final picture. 7. Depth of field helps stereo photography, so a fast film compensates for a small aperture. ISO 100-800 films give excellent results. 8. The nose piece acts as a lens shade to prevent reflection and flare. However, under certain conditions stray light may still enter the left mirror. This will appear as flare in the far left of the viewfinder. To eliminate it turn the camera slightly or shade the right side of the 3D Cap with your hand. 9. Tips for taking dramatic 3D pictures: As in conventional photography, the subject of your picture will usually be placed in the center and best exposure is obtained if the sun is behind the photographer. 10. Stereo photography is different from ordinary photography. A 3D camera not only records the shape of things. It also records the depth of the scene. 11. To take advantage of this feature, 3D pictures should show foreground objects as well as the background scene. When photographing a person, include objects in front, such as branches of a tree, and an interesting view behind. You would not, as in conventional photography, place a person against a wall to take a close-up, since the picture would not have depth, and the stereo effect would be limited. 12. Important notice: When taking pictures you can point your camera up or down but pay attention to keep it well at level horizontally. Never hold your camera vertically, since you would not be able to view such pictures in stereo. 13. Printing: The 3D Cap's twin lens system takes two pictures in each frame, viewable immediately after processing. 4R prints work best. Tell the lab to print as normal, NOT half frame photographs. 14. Viewing: Put the pictures in the Loreo viewer (below) and hold the eyepiece about 6 inches from your eyes. It may take a few seconds for your eyes to adjust to the stereo image
15. Different people have different eyesight, so you may have to move the viewer closer or further away from your eyes for the stereo effect to appear. 16. For best clarity when viewing 3D pictures avoid bright lights reflecting on the viewing lens surface. Natural light falling on the stereo print, not on the stereo lens, will always give the best stereo effect.
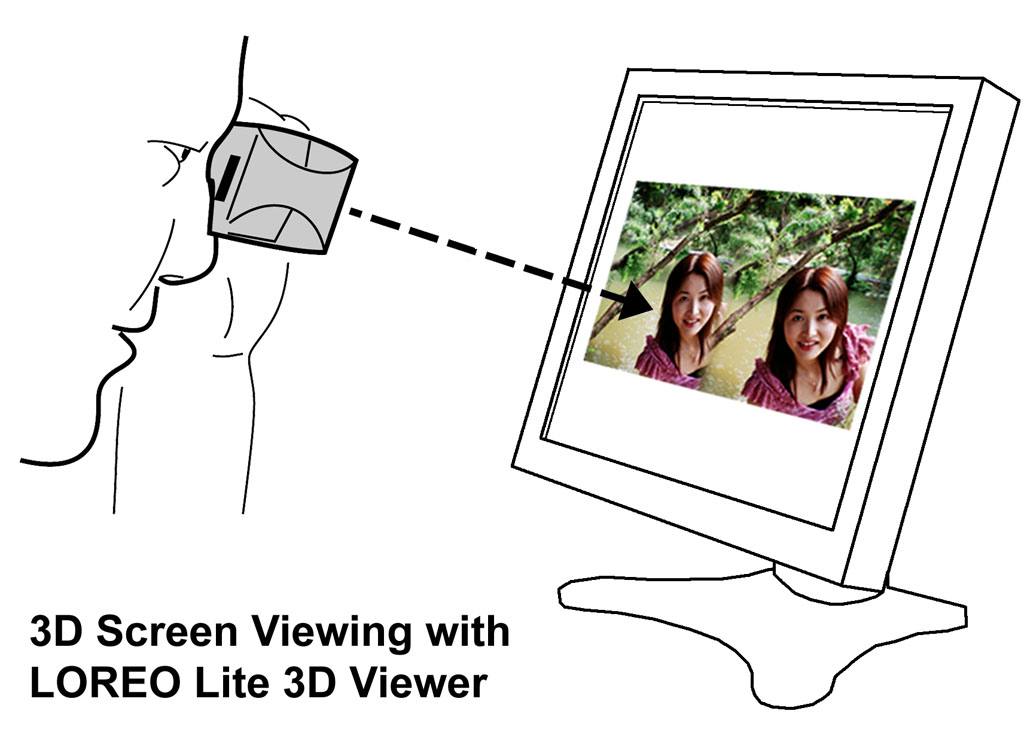
Viewing LOREO 3D pictures on Screen:
 Care and Troubleshooting
Return to the Loreo Homepage. E-mail: info@loreo.com |